- Help
- Terms of Service are avaible at hosting7.eu/en/terms-of-service/.
- To enter control panel use your username, /your website's address/ or email and a password that was set when you created an account.
- To use mailbox you need to create an email account in the control panel first.
- Mail server is mail.hosting7.eu.
- FTP server is your website's address (e.g. user.hosting7.eu)
- If you already own a domain and you create a new hosting account for this domain, all needed information will be automatically added. The only thing left for you to do is enter our DNS servers in the control panel of the registrator of your domain:
- ns1.hosting7.eu
- ns2.hosting7.eu
- ns3.hosting7.eu
- All rules for the accounts with our domains are valid for accounts with domains that were not registered on our hosting.
- In you have any troubles visit our forum .
General information for customers:
For example, if you have an account "happy", a web site happy.hosting7.eu and you create an email account named “user”, your login to the mailbox and your email will look like this: "user@happy.hosting7.eu".
You can send and receive emails using an external program like Microsoft Outlook, Mozilla Thunderbird or other. Login and password are the same as for mailbox in browser.
You do not need to change information about the DNS servers in case you have registered your domain on our hosting — it will be configured automatically and added to the chosen account.
For example, your FTP login will look like this: "user@user.hosting7.eu", if you create FTP account named “user” and you own a domain user.hosting7.eu. The main domain (connected, for example, to the FTP logins) is always the first domain of the hosting account, the one that was chosen while creating the hosting account. In the email account names created for this hosting account the part after "@" may be picked among all the domains connected to this hosting account.
- MainVPS
- CMS
- Troubleshooting
How to Install and Access Webmin
Webmin is available for all the distributions except Arch Linux and Debian 7 and exclusively for those clients who have wisely invested on the plans VPS-1024 or even better VPS-2048. Find out more.
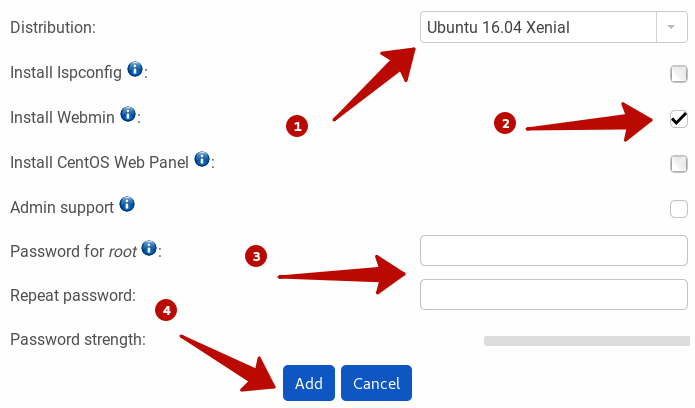
At the moment of setting up our Virtual Private Server (VPS), we can also install Webmin Panel. After making sure you have choosen the right VPS Plan, follow these steps:
- Select a supported distribution.
- Check the box to Install Webmin.
- Create a strong password for your VPS.
- Click on "ADD" to finish.

Access Webmin
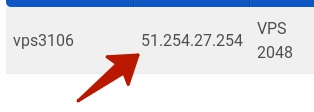
Once our VPS has been created, we can access Webmin from the assigned IP.

It's easy, just follow the instructions below to enter the right URL on your browser.
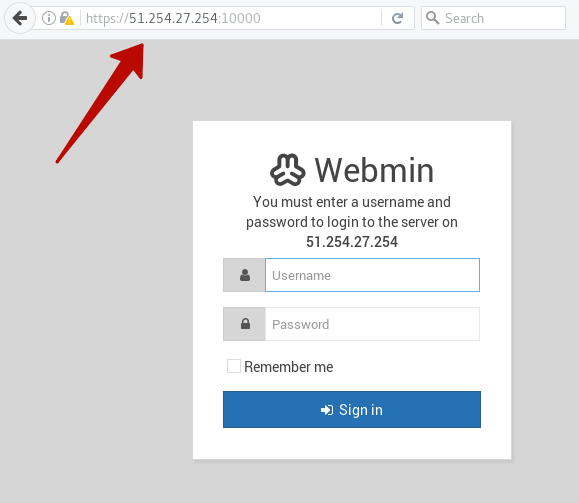
1.Webmin will be available using https in the TCP port 10000 in combination with your assigned IP. Example: https://ASSIGNED-IP:10000.
2. Fill the Username with root and enter the password you created for the VPS.
3. Press the login button.

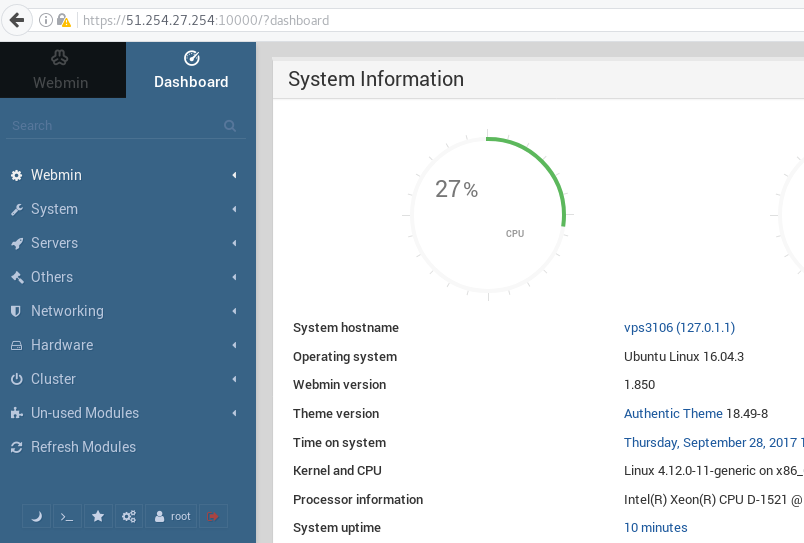
Now we can use Webmin in our VPS.
